Self-Watering Containers (2 Ways)

")
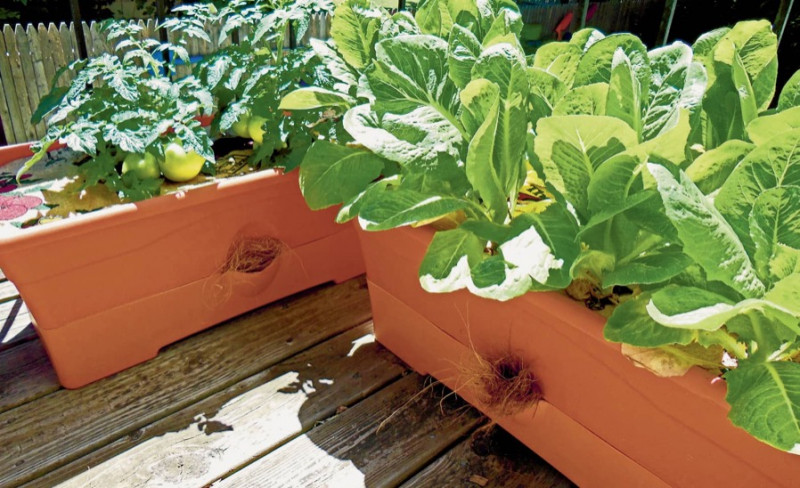
Watering plants in containers can be a time-consuming chore, particularly in the heat and wind of summer. Making your own self-watering containers is a great way to hack a watering system. There are many commercially available versions of self-watering containers, also known as self-watering grow boxes, self-watering pots, and self-watering planters, but you can make them yourself for a fraction of the cost out of some easy to find items. Learn how you can make a self-watering container at home.
Solution 1.
Two pots and a plastic cup are all you need.
Making your own self-watering container doesn’t need a lot of time or effort. Find two planting containers the same size; place a yogurt or butter tub in between the two containers to create a water reservoir; drill extra holes in the “inner” planting container base; and feed a piece of cotton rope through one of the holes into the bottom water reservoir. Fill the reservoir with a hose or watering can by lifting the container or by cutting a feed hole to help supply water.
This technique works great on a balcony, fire escape, or patio. Filling your reservoir with rainwater when possible is a wise choice as there are fewer chemicals in rainwater compared to city water or softened water. Never use softened water in your container gardens because the dissolved salts are toxic to your plants. Most self-watering containers are food safe, but do your research and make sure this is true before planting in a self-watering unit.
Solution 2.
You won’t have to worry about over watering plants once you finally remember about the whole watering thing. Well, this homemade self-watering planter takes the guesswork out of over watering, and it also cuts down on how often you need to water plants.
All you need is:
- A planter (with no drain hole in the bottom)
- A plastic planter saucer
- An empty plastic one or two-liter bottle
- A length of PVC, about 2 feet
- A drill
- A hand saw (just a simple one, or whatever else you have that will cut plastic)
- Potting soil and plants
Instructions:
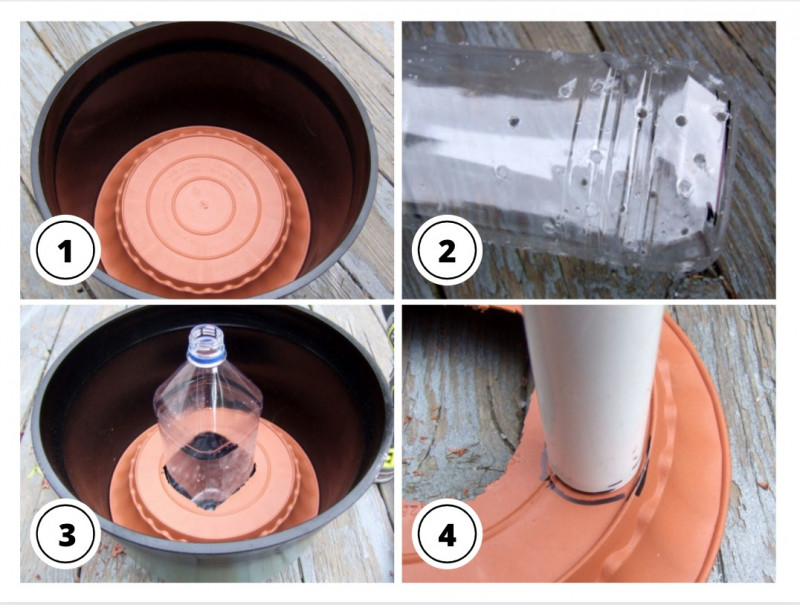
1. Prepare your wicking bottle.
This is the bottle that is going to sit on the bottom of the planter and act as a wicking device to get the water to the soil. Drill lots of holes (around 5/8ths of an inch is good) in the bottom half of the bottle. Cut a hole in the center of your saucer, just large enough for the bottle to fit through.
2. Cut the bottle, so it will sit flush with the saucer. Place the saucer and bottle into the planter. Press the saucer and bottle down as far as they will go. Mark your bottle just above the rim of the saucer, then take the bottle and saucer back out and cut the top of the bottle off along that line.
3. Prepare your watering tube. Place your pipe on the saucer (anywhere between the bottle hole and the edge will work), and trace it. Cut out the hole you just drew.
4. Adjust the height of your watering tube. Place the pipe inside your planter and look at how tall it is. You don’t want it to stand too far out of the soil and look like you planted a PVC pipe. You only need it to be 2 or 3 inches above the soil line, so mark that spot and cut down your pipe as needed. Place the saucer back in the planter. Insert the plastic bottle and the watering pipe. Add a drain hole to your new self-watering planter.
You can measure it, but the drain hole should go through the planter and be just under the base of the saucer. This will do two things: keep the soil from holding too much moisture, and it will let you know when you are done watering by spurting water out the side when it’s full.
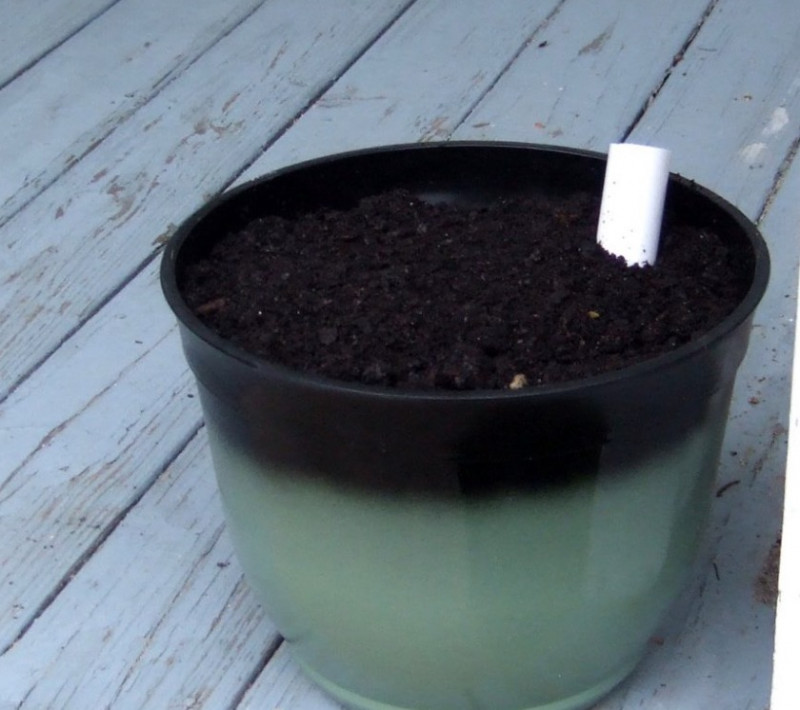
Carefully start filling your planter with potting soil.
Use a little scoop or cup at first. Make sure that the plastic bottle wick is filled first, then load up the pot. As you are filling the pot, pull the top of your watering tube towards the edge of the planter so that it sits at an angle.
Done! Now you are ready to plant away! And load it up with water.