Making a Mini Waterlily Pond


Would you love to your own tiny oasis in your backyard? The flowers of a blooming water lily is simply breathtaking! Probably the reason more gardeners don’t grow water lilies is the mistaken idea that they are hard to grow. In fact, making a mini waterlily pond from scratch is not a big deal. Give water lilies sun, a rich soil, and of course, water – that is all they ask, and these aquatic plants will reward you with colorful flowers with colors only nature’s canvas can produce. Read on to learn how to make your own tiny blooming paradise by planting a miniature pond with a choice selection of petite plants. Don’t be surprised if dragonflies come to investigate!
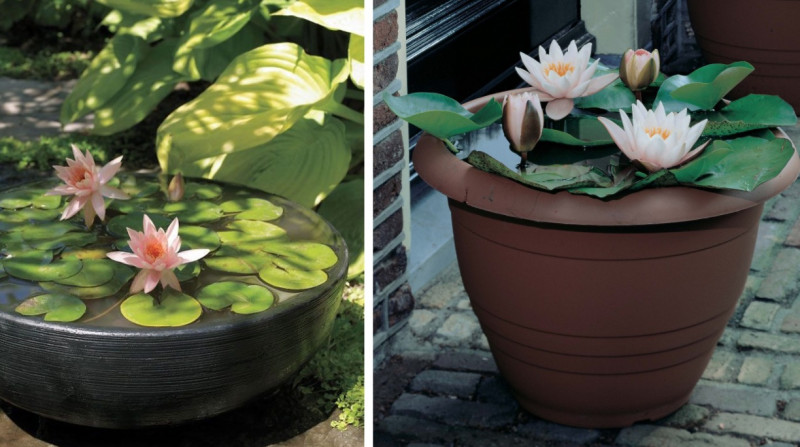
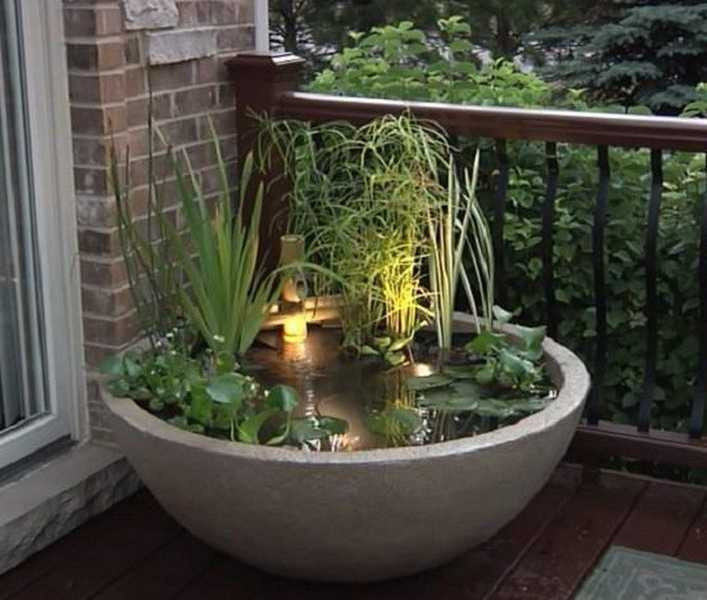
Center stage is the white pygmy waterlily, whose rounded leaves float on the surface, cutting down the amount of light reaching the water, which keeps algae at bay. The diminutive reed mace and iris create vertical contrast. Here this simple ensemble takes on an oriental flavor with a backdrop of woven willow and pebbles.
To avoid limescale, use soft water to fill the planter or, better still, rainwater, which is chlorine- free. Gravel in the pots keeps the compost in place underwater.
How to make a mini waterlily pond.
You will need:
- Shallow ceramic planter without drainage holes or a container plus bungs to block any holes
- 3 fine-mesh aquatic planting baskets and plastic netting (optional)
- White pygmy waterlily (Nymphaea tetragona), small reed mace (Typha minima), American blue flag (Iris versicolor)
- Aquatic compost and washed pea gravel

Instructions:
1. Prepare a planting basket Add aquatic compost to the bottom of a mesh planting basket. Unless the mesh is fine, lay a square of plastic netting in the bottom first to retain the compost.
2. Plant the waterlily
Set the pygmy waterlily in the basket, leaving enough space on top of the soil for the gravel topping. Fill in around the sides with more aquatic compost.
3. Add the gravel topping Cover the compost with gravel then water gently to settle the compost around the roots without disturbing it. Repeat Steps 2 and 3 for all the plants.
4. Fill the planter
Add water to the planter, leaving sufficient room to accommodate the volume that will be displaced by the planting baskets when they are in position.
5. Submerge the basket
Gradually lower the baskets into the water. If planting into a deeper container such as a half-barrel, you may need a brick to support the pots at the correct depth.
More plant options for the mini pond:
Acorus gramineus ‘Ogon’
Corkscrew rush (Juncus effusus f. spiralis)
Houttuynia cordata ‘Chameleon’
Iris versicolor ‘Kermesina’
Water pennywort (Hydrocotyle umbellata)
Miniature horsetail (Equisetum scirpoides)
Nymphaea ‘Pygmaea Helvola’ F Parrot’s feather (Myriophyllum
aquaticum)
Water lettuce (Pistia stratiotes)
Umbrella plant (Cyperus species, especially dwarf forms)
Water hyacinth (Eichhornia crassipes) F Eleocharis acicularis
Lysimachia nummularia ‘Aurea’
Can these be in full sunm