Collect and Save Tomato Seeds


Saving your own tomato seeds is a great way to preserve those varieties that have proven themselves as dependable performers in your garden. And it also prevents disappointment next season, when many cultivars disappear from store shelves if they didn’t prove to be popular. Plus, saving your own is economical as well as convenient. With your own private reserve, there’s no more shelling out top dollar for organic stock, or anxiously waiting for those packets to arrive in the late winter mail. Now, let’s get into the four methods to save your own tomato seed for planting.
Anyone who has composted leftover tomatoes has probably had the experience of seeds from those tomatoes "volunteering" in the garden if the compost that has overwintered is then used as a soil amendment or mulch the following spring. Or perhaps you've seen tiny tomato volunteers spring up in the garden where tomatoes have fallen off the plant the previous year. Tomato fruits are laden with tiny seeds that will readily sprout if they reach the soil. But rather than waiting for accidental volunteers, it's quite easy to save seeds from tomato fruits so you can plant them exactly when and where you want.
When to save tomato seeds.
Tomato seeds can be collected from fruits that are fully ripe, from mid-summer to fall. Tomatoes are a rather slow-growing plant, so most gardeners will want to start these seeds indoors quite early in the spring. It can take tomato seeds six to eight weeks to become viable seedlings, then once planted outdoors, the seedlings may require as much as two months to produce ripe fruit. This varies somewhat depending on the variety and size of the tomatoes—small cherry or pear tomatoes will begin bearing fruit much faster than large beefsteak tomatoes, for example. But overall, tomatoes are one of the slower-growing vegetable plants.
Working with tomato seeds.
Seeds from many plants can be saved simply by waiting for seed pods or fruit to dry, then opening them up to collect the seeds. Tomatoes take a bit more work because their seeds are enclosed in a gel-like sack that contains growth inhibitors to prevent the seeds from sprouting inside the tomato. The best way to remove this gel covering is to allow the fruits to rot and ferment. In nature, this happens when the fruit falls off the plant. For seed savers, we're going to speed up the process.
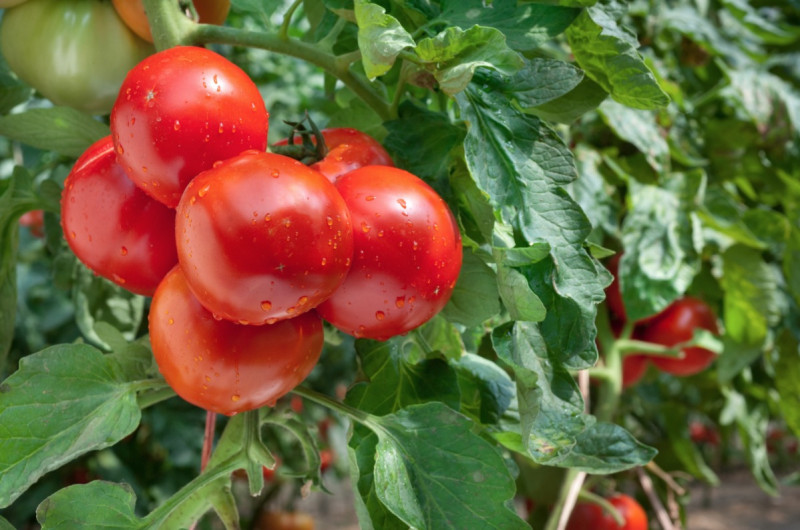
The first step is to choose your best-looking tomatoes. You want to save seed from the finest fruit, so that next year's plant will have good genes. Remember you should only save seeds from open-pollinated (OP) tomatoes. That includes all the heirlooms. Seeds from hybrid tomatoes, while they may sprout and grow, often produce tomato plants that revert to one of the genetic parent plants, which can produce much different fruit than you're expecting.
What you'll need:
Equipment/ Tools
- Mixing bowl
- Canning jar
- Colander
Materials
- Ripe tomatoes
- Cheesecloth or paper towel
- Paper plate
- Sealable envelope
Instructions
1. Harvest the seeds
To start the process, slice the fruit in half so that the stem end is on one side and the blossom end on the other. This will expose the seed cavities better than if you sliced through the stem end.
In some pasta and smaller tomatoes, the seeds are so concentrated in the cavity that you can scoop them out and still be able to use the flesh of the tomato for cooking. Many slicing tomatoes will require scooping out all the flesh with the seeds. Whichever the case, scoop the seeds into a clean bowl or jar.
2. Fermentation
If there is not enough liquid from the tomato pulp for the seeds to float in, add up to a cup of water to help separate the seeds from the pulp. Then set the bowl or jar of tomato seeds and pulp in a warm, out-of-the-way spot. You will need to allow 2–4 days for the fermentation to take place. As it does so, the mixture is going to begin to smell awful, so store the bowl where you won't pass by it frequently. If you have glass canning jars available, they make a good container for fermenting tomato seeds. The extra space at the top of the jar controls some of the odor and the clear sides let you keep tabs on what is happening. Covering the top of the jar with cheesecloth or paper towel will keep fruit flies out and also diminish the spread of the unpleasant odor. Remember to label each variety.
Every day or so, check on the process of the fermentation. What you eventually want to see is a layer of mold on top of the seeds and pulp. The process is done when bubbles start rising from the mixture or when the entire layer of tomato pulp is covered with mold. Don't leave the seeds fermenting past this stage or they may begin to germinate.
It is harder to see the layer of mold through the glass jar, but you can generally tell the fermentation is complete when the seeds settle to the bottom of the jar in a watery liquid and the thicker pulp and mold sit on top of them.
3. Separate the Seeds
Finally, you can remove and dispose of the mold covering. Lifting it before rinsing the seeds will make rinsing easier, but it's not necessary. You can add some water to the jar or bowl and stir or shake vigorously. The good seeds will settle to the bottom, allowing you to drain off the excess first.
4. Clean the Seeds
Strain the seed mixture into a colander and rinse the seeds well under running water. Try to remove any remaining pulp bits and mold, so that only clean seeds remain.
5. Dry the Seeds
Spread the seeds onto either a paper plate or glass dish to dry. Don't use paper or paper towels or the seeds will stick to them and be difficult to remove. Set them in a warm, dry spot and allow the seeds to dry completely. Shake them on the plate daily to make sure they don't clump and that they dry evenly. Don't try to speed the process by using heat or you might destroy the seed.
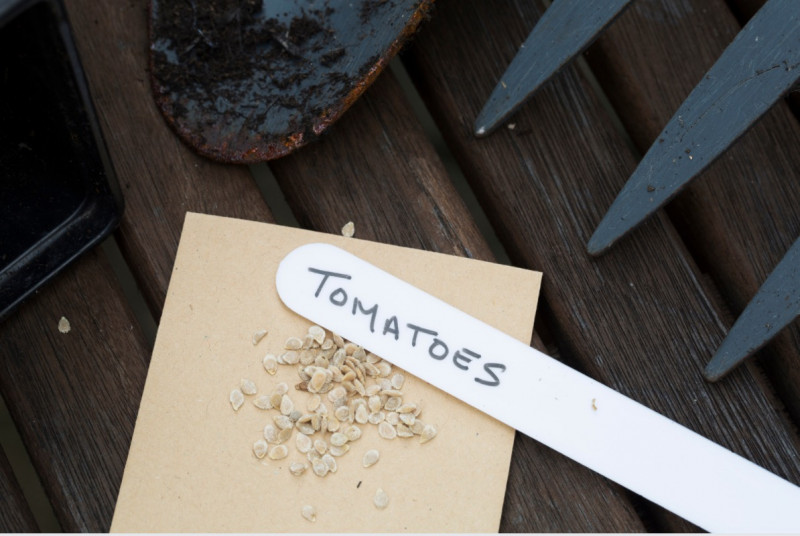
6. Store the Seeds
Once the seeds are thoroughly dry, you can store them in an airtight container, in a cool, dry place. The envelope shown here will be placed in a canning jar. Remember to label and date your seeds.